Tuesday, December 31, 2013

My Best Curly Hair Products of 2013

Happy New Years Eve gang!  The clock is nearing midnight here, but I thought it'd be nice to wrap up 2013 by sharing the products that I couldn't be without in 2013 that I'll be carrying with me happily into 2014. This is a pretty short list because these are products that I use at least 4-5 times per week that I can always count on. That's a high standard I think, so the list reflects that.

1) Suave Professionals Captivating Curls Whipped Cream Mousse 
No surprises here! This is an absolute all-time favorite of mine. You'll know whenever they discontinue it by the sound of wailing and sobbing coming from the US East Coast.  What can I say about it? It's CHEAP. Less than $3 on Amazon and in stores.  It is unlike any other mousse, so if you think you hate mousses, think again.  It literally melts into the most perfect, creamy texture when you rub your hands together.  It absorbs effortlessly when you scrunch it into sopping wet hair.  No crunch, it's nearly impossible to overdo it, and it doesn't weigh down my very fine hair.  I do not intend to be without this product even once in 2014.

2) Kinky Curly Knot Today Leave In Conditioner
I've been using this leave in for years.  It makes my tangles disappear with no effort. It provides a wonderful base for my other products.  It has a light scent and doesn't weigh my hair down.  Note though that I don't use this for moisture. It's not moisturizing enough on its own to nourish dried out hair.  But it's wonderful for giving you a nice, even base before you style.  At around $12-16 for a bottle depending on sales, it's a bit pricey but a bottle lasts me a year because I don't need a ton to work through my tangles.  Definitely a staple in my product rotation for a long time to come. Check it out here!

3) Denman Brush
I've used a Denman brush for years. I'll never go back to the ball and spokes style paddle brushes of high school years past.  These brushes are gentle, durable, and an amazing value.  I notice a huge difference in how my scalp feels when I use this brush and I definitely noticed a huge reduction in strand breakage when I switched back in college.  A really simple change that can make a big difference.  There are lots of size options but I personally like the 9 row for everyday. 

4) Microfiber/Flour Sack Towels
 I have bunches of these.  The ones I'm using right now are the Aunt Martha's flour sack towels.  I apply all my products to sopping wet hair, usually in the shower.  But the problem is that applying to soaking wet hair means when you're done applying, your hair is still soaking wet!  Normal cotton towels wick away too much product and moisture, and the rough up the hair cuticles causing frizz.  Flour sack towels and microfiber towels prevent frizz and leave product where you want it while taking away a good amount of water to decrease your drying time.  If I air dry with products without scrunching with a towel, it takes about 4 hours to get my hair totally dry.  With the towels, my dry time is cut in half.  They're a must for natural curls.

5) Spiral Solutions Curl Enhancing Jelly
Spiral Solutions is an Etsy company that makes natural hair products.  I have loved everything I've tried from them (I've used the Deeply Decadent deep treatment with great success, the protein treatment, and the firm hold gel as well).  But this product takes the cake.  It's a medium hold product on my fine hair but some might call it light hold.  It gives my hair incredible shine, it's all natural, and it really holds up well in lots of weather conditions.  It's a bit of a splurge, but I only use about a dime sized amount on my hair, so a bottle lasts me a good 6 months+.  If I'm not using my Suave mousse as my styler, I'm using this.

What were your holy grails from this year? Let me know below!

Thursday, December 19, 2013

Squish to Condish: My New Favorite Way to Condition My Hair

So if there's one thing that I love about having time off for the holiday season, it's the extra days to experiment with my hair knowing that if an experiment utterly fails, it's ok because I don't have to go to class!
I read about the Squish to Condish method on a hair forum, and I was skeptical.  I don't follow the true Curly Girl method anymore (I use a sulfate free shampoo rather than conditioner washing), so I didn't think that the method would be super beneficial for me.  I thought my hair was pretty well hydrated overall and I was quite happy with it!

But, as you can probably guess, that all changed after I gave this method a whirl.

Here's the before and after, and then I will explain what this method is all about and how you can do it with the products that you're already using.

Hair before using Squish to Condish method
After using Squish to Condish
As you can see, the squish to condish made a huge difference (I also got rid of my stringy ends with a haircut, but the overall curl pattern in the before photo is still representative of what my normal hair looks like without using this method).

So how does this work?

1) Wash your hair however you normally would, whether that's conditioner washing or shampoo washing. Rinse out your preferred washing agent like normal.

2) Move your hair off of your head with your fingers so that it's not all stuck to your scalp.

3) Grab a big pile of conditioner and start working it through your hair until it feels slippery like seaweed.  You can finger comb it through for this step. The focus of this step is getting the hair evenly coated and working out tangles, so if you need to use a wide toothed comb to help out, go for it.

4) Now, instead of just running water over to rinse, take your hands and cup some water in them.  Squish the water upward into your conditioned hair, forming curls.  Think of it like this: you're trying to swell up the cuticle in the center of each hair strand, so you're trying to replace the conditioner with water.

5) Add more conditioner using a squishing motion.

6) Squish water into your hair.

7) How much? How many times? You should keep doing this until your hair is very wet, but it stops dripping water out.  I know that sounds really odd. This is why I was skeptical.  The first time I did this, it took like 6 tries to get the water to stop dripping.  But it did happen.  If your hair is extremely dehydrated, you might have to stop for fear of wasting water/product before the dripping really stops.

8) Style your hair like you usually would.  I have found I can easily skip the leave in conditioner with this and move right to a mousse (I still adore my Suave Captivating Curls mousse) or a gel (my current favorite gel product is the Curl Enhancing Jelly from Spiral Solutions).  I apply my mousse or jelly in the shower, because it's quick and easy.  I then squeeze out my hair with a flour sack towel, which I find are much gentler for squeezing water out of hair than a normal bath towel.

If you give this method a try, let me know how it goes! Happy holidays, curlies!

Wednesday, November 13, 2013

Checking in!

Hi all!

I apologize for the lack of posts in a while!  But, I'm here to check in.  Better late than never, right?

My curly routine is still just going along swimmingly, which is a large part of my lack of posts (the other part: grad school keeps me super busy!).  I am still doing sulfate-free shampoos, thick conditioners, and my one true love, Suave Captivating Curls Mousse.  I also added a new leave in, the It's a 10 Miracle Leave In.  I'm liking it a lot so far, but I want to try the keratin version before I make a review of it.

Anyway, I would love some inspiration to get back into the blogging swing of things!  So tell me, what do you struggle with the most with your curly hair or beauty routine?

The Story of My Life


Sunday, August 4, 2013

Review: Garnier Fructis Volume Extend Instant Bodifier Dry Shampoo

Hey Curlies! I've got a review of a new dry shampoo that is just starting to really hit store shelves en masse.

It is by Garnier. Now, don't stop reading yet.  I am not a big fan of Garnier.  I mean, after the standard middle school obsession with everything they make was over, I discovered that most of their stuff is pretty meh.  The Triple Nutrition Conditioner is a great one for those following the Curly Girl Method, but I personally find it too heavy for my fine hair.

Speaking of fine hair, back to the review!

"We wanted to put more words in the name, but we ran out of bottle"
So as you know if you've spent time here before, I have very very fine hair.  I need to wash everyday, even when following sulfate-free routine, because of oil at my scalp.  Dry shampoo seems like it would be perfect for someone like me.  It can volumize and de-grease on a no-wash day.

But to be honest, I've never really been one to use them!  In my experience, the few that I've tried (Batiste, Dove, and Tigi) all smell awful and are scented soooooo strongly!  I just couldn't handle that smell.  They would leave my hair feeling dirtier rather than cleaner, and I felt like anyone nearby knew I had skipped a wash because of the overwhelming "HI I USED DRY SHAMPOO TODAY" smell radiating from my hair.

So I was skeptical when I saw this, but I was traveling and knew I was going to need to have a dry shampoo day.

Well, the day came when I knew I'd need to use it.  I looked at my oily scalp in the mirror, and let out a sigh as I prepared for whatever overwhelming, gag inducing scent Garnier had squeezed into this bottle.  And I sprayed.

This. Does. Not. Smell. Bad!

That already put it miles ahead of the competition for me.  The scent is very light.  It's not overly fruity or floral or anything.  It just smells nice and fresh.

When I looked at my hair post-spraying, I expected to see a white sheet of gunk that I would need to frantically brush away in order to reveal my brown hair, with a nice grey cast of course.

Nope!  Just a few light white streaks, but nothing that I couldn't take care of with some light brushing and finger massaging.

So for those keeping score at home, this shampoo 1) does not stink, and 2) doesn't leave as much of a grey gunk residue.  Woo!

You be the judge on the cleaning power.

Before
After
Before
After
So overall, I think you can tell that it does do some decent volumizing, and will take care of some oil.  But it isn't perfect.  Despite not smelling terrible and not leaving gunk behind, it could do a better job with oil removal.  It looks better after spraying, but it's not "I just showered" clean.  But I don't know if that is a fair standard to compare it with.  After sparying this, I felt I could leave the house and not feel icky.  

I think where this product could really shine in your routine is as a root volumizing spray, whether on clean or slightly oily hair.  If you're super oily, I don't think this is going to fix it completely.  But mild oil or clean hair that you want to clean/volumize, this would work well.

I will definitely be keeping this in my rotation for when I have a little bit of oil (perhaps before a night out, for instance) or when I want to have some extra texture for volumizing.  

Check it out on Amazon or in your drugstore!  Have you tried it? What did you think? Do you have any dry shampoo recommendations for me?

Saturday, July 27, 2013

You're Wearing the Wrong Bra Size, I Guarantee It! How to Determine Your Correct Bra Size

Hello all!  So I know the topic of this blog is generally hair and makeup related, but I have to tell you about my bra journey.  I recently figured out that I've been wearing the wrong size my whole life, and I went from a 36B to a 30F bra size.  I am willing to bet that every single one of you reading this is currently wearing the wrong bra size.  Do your shoulders hurt at the end of the day? Do your straps always fall down unless you tighten them so tight that they leave marks?  Does your band ride up in the back? Does the piece of plastic or metal in the middle of the two cups not touch your skin?  Do you "quadboob" (where tissue from your breast rolls up over your cups, creating an uneven surface)? These are all some (not all) of the signs that your bra is the wrong size.

First of all, let's dispel some myths:

Myth #1: I got sized at Victoria's Secret, so I already know what my correct size is.

Victoria's Secret and most department stores measure you using an outdated system of measurement, where they go around some part of your body (it varies widely) and then do some crazy math like adding 4 inches to get your band size.  When I was "fitted" at Victoria's Secret, they measured me over my shirt and over the bra I was wearing.  The thought occurred to me: "If you're just taking a measurement over my current bra, aren't you just going to tell me what size that bra is?"  Sure enough, that was usually the outcome.  Other times they would just seem to make up a random size, usually either 34B, 34C, 36B, or 36C.

The reason that they use this strange system of +4 inches is because bras used to be made with less elastic materials.  Since the bands and cups wouldn't stretch as much as they do today, they would just add inches.  Victoria's Secret likes to put women into band sizes that are too big, with cups that are too small. Sure, that gives some awesome looking cleavage. But it also hurts like heck.
None of these bras fit. Good job Victoria's Secret.
Also, it's a money game (what isn't these days?).  Stores like Victoria's Secret know that they simply cannot keep enough sizes and styles in stock to fit everyone properly.  So they have put millions and millions of dollars into advertising that every woman should be between a 32A and a 38DD.  Anyone else must be a freak.  This would be like a dress store saying, "Well, we don't have the capacity to store dress sizes 2-30 and it just isn't profitable to do so, so we're going to stock sizes 6-12 and tell everyone that they should be in that size range."

Myth #2: Most women fall within the A-C cup range, and D cup or larger is freakishly huge or implant size.

Do you know what a 32FF looks like? Probably like a porn star, right?

Properly fitted 32FF.  Image from brabandproject.com

OK so that's not freakishly huge.  What about a 34G? That's gotta be like Courtney Stodden level implants, right?

A properly fitted 34G. Image from brabandproject.com

Not exactly.

Alright so maybe now you're seeing that these "big" letters aren't actually freakish at all.  They look pretty normal.  Let's go the other way.

32C...that's like the Victoria's Secret Gold Standard, right? Cleavage everywhere!

Properly fitted 32C. Image from brabandproject.com
Alright, what about a 34B? Heck, the odds are that's the size you're wearing right now, since Victoria's Secret thinks that's average! What does that look like?  Actually, brabandproject.com has ZERO images of a properly fitting 34B.  When measured properly, it's an incredibly rare size.


Myth #3: There is a standard looking "B" cup or "C" cup or even "D" cup

Completely remove from your head the idea that there is such a thing as a "B" cup sized chest.  Cup size cannot be separated from band size.  They are intertwined.

Example: Here is a 28D:

Image from brabandproject.com
Here is a 34D:

Image from brabandproject.com

The band size affects the cup size.  This is why a 28D looks completely different than a 34D.  So stop looking at yourself as a "C" or a "D."  The letter cannot and should not define how you approach your breasts.

Myth #4: Bras are just uncomfortable, whether properly sized or not.

My shoulders used to hurt every.single.day.  By about 2:00pm.  Burning, aching pain.  I would rush home to take my bra off.  When I'd arrive home, screaming cats or need to use the restroom be damned! I needed to take the bra off before I did anything else.  And oh the relief! The sweet relief of taking off a bra.

Now that I've figured out my actual size, this is all a thing of the past.  No more "I'm home, now get this damn thing off of me."  I don't even notice that I'm wearing one.  I actually slept in one accidentally the other night.  That would have been unthinkable in my old bras.

How do I figure out my bra size?

I used the extremely helpful and well thought-out guides on www.reddit.com/r/abrathatfits in order to create this post.  I cannot overstate how helpful the ladies over there are, so I would definitely recommend that you make a free account! 

You've got to measure yourself!  The process seems daunting written out, but it takes all of about 5 minutes.

You'll need a soft tape measure.  If you don't have one, grab some ribbon or string that isn't stretchy and a hard measuring tape or a yardstick (you can lay the string against the measuring tape to get the numbers in inches).  You'll also want a piece of paper and pen to jot down your numbers.  It's best to do this in front of a mirror.

1) Remove your shirt and your bra.

2) Measure your snug underbust with the tape measure (or ribbon or string). You want the tape comfortably snug against your skin, being sure to keep it parallel to the ground (hence, the mirror).  Check out this picture if you aren't sure where to place the tape measure for this or any other measuring step.  Write down the number as your Snug Underbust.

3) Measure your underbust with the tape wrapped as tightly as possible.   Like you are trying to break the tape Incredible Hulk style. Be sure it's parallel to the floor.  Write down the number as your Tight Underbust.

4) Measure your bust while standing.  This means you are placing the tape measure comfortably around the largest part of your chest.  Be sure to keep the tape measure parallel to the floor.  Write down the number as your Standing Bust.

5) Measure your bust while leaning over.  Your face will be looking at the floor and your back should be parallel to the ground. Keep that tape measure straight! Write down the number as your Leaning Bust.

6) Measure your bust while lying down.  Lay down with your back on the floor.  Keep the tape measure straight, and write down the number as your Lying Bust.

Now that you've got your measurements, plug them into this calculator. 


The calculator will give you a good starting point, but now you need to go try bras on.  Don't be discouraged if you can't find the precise fit right away.  You may want to check out how to determine your breast shape, because shape definitely can affect fit! And of course, you need to know where you can go to buy a bra in your new size, because Victoria's Secret probably doesn't carry it!


Please let me know in the comments if you try this out! I would LOVE to hear stories from your gals about your bra journeys!  Thanks for reading!

Wednesday, July 24, 2013

Midsummer Update!

Hi Curlies!

I'm sorry for the complete radio silence from me this summer. My internship takes up all of my free time it seems.  I'm also in the process of transferring schools, which brings a whole new set of adventures like apartment hunting and moving.  I promise though, I've always got DormRoomCurly in the back of my mind.

I've got a couple of posts planned for you all soon.  I've got a new dry shampoo that I am LOVING and want to tell you all about ASAP.  It isn't CG unfortunately, but I've gotta say, it is the first and only dry shampoo that doesn't make my hair feel gunky/dirtier after I use it. And the smell doesn't linger. Incredible!

Second, I want to talk to you guys about the importance of applying products to absolutely soaking wet hair.  I get a lot of questions along the lines of "What can I do to make my hair look better cheaply" and frankly this is the best tip I've got, since it is free!  I will show you guys the difference that applying to soaking wet hair makes on my hair firsthand.

And finally, I just discovered something that is truly life altering.  I've been wearing the wrong bra size.  Not just a little wrong. A lot wrong. So I'm planning a post that might be off topic for this blog, but I think it's a really important one than can make a dramatic difference for a lot of you, since odds are, you're also wearing the wrong size. 

So that's a quick update!  As the summer winds down, I'll be working on those posts and trying to catch up on some comments you all have left in the meantime.

Monday, May 27, 2013

First Impressions: Macadamia Natural Oil Deep Repair Masque

I ran out of my Spiral Solutions Deeply Decadent deep treatment, so when I went to Target to grab some groceries, I finally had the perfect excuse to pick up the Macadamia Natural Oil Deep Repair Masque for myself.  I gave it to my mom for Mother's Day one year, and she loves it, but I hadn't tried it myself before.

It is significantly cheaper on Amazon (~$25 on Amazon, compared with $32 at Target), but I decided to grab it while I was there.

I have only used it once, a couple of hours ago, but I thought it would be fun to give you guys my first impressions and then update in a week or two with my final thoughts on it.  Sorry in advance for the cell phone pictures; my big camera battery was dead!


The first thing I do with a new product is read the ingredients.  Here's the ingredient list:

Aqua/Water/Eau, Cetearyl Alcohol, Glycerin, Cetrimonium Chloride, Quaternium 80, Amodimethicone, Ricinus Commmunis Seed Oil (Castor), Parfum/Fragrance, Algae Extract, Tocopheryl Acetate, Melaleuca Alternifolia (Tea Tree) Leaf Oil, Anthemis Nobilis (Roman Chamomile) Flower Oil, Aloe Vera (Aloe Barbadensis) Leaf Extract, Macadamia Ternifolia Seed Oil, Argania Spinosa (Argan) Kernel Oil, Limonene, Butylphenyl Methypropional, Hexylcinnamal, Linalool, Citronellol, C11 15 Pareth 7, C12 16 Pareth 9, Trideceth 12, Trimethylsilosyamodimethicone

First of all, it's got Amodimethicone and one more silicone in it.  This silicone doesn't build up even if you aren't using a sulfate-shampoo because it is water-soluble.  Many curlies following the Curly Girl method have found that they can use the "A-cone" without issues.  The other silicone is the very last ingredient, meaning that there is very very little of it.  If I were following Curly Girl strictly (conditioner-only washing), I would still give this a try, given that the a-cone is water soluble and the other silicone is only present in a very small amount.

You'll notice that it's got water as the main ingredient, and it has a lovely fatty alcohol second.  That's a good sign for me, as my dry hair needs moisture, and that's what fatty alcohols are good for.  Glycerin is a humectant, so it's great for the more humid months, and spring and fall in particular.  Probably not going to work as well in the winter with glycerin so high on the ingredient list though, as this will cause your hair to push moisture into the air, rather than holding onto it.  As I scanned the list, I was happy to see lots of oils, but if you don't like castor oil, this a no for you.  I also love aloe hair products, so I was excited to it make an appearance.  Argan oil is also an interesting ingredient, as it's the new fad hair product ingredient.

Once I've scanned the ingredients, I look at the texture.  This is thick stuff but it somehow manages to feel light at the same time, as opposed to heavy and hard to work with.


Next is the scent test.  This product is heavily scented.  Going back tot he ingredients list, you'll see that fragrance is very high up there.  I've thus far found that it does linger on my hair, but I like the scent.  It smells vaguely tropical to me, but in a more earthy way than the typical tropical scent.

Time to apply.  I took a decent sized glob and worked it through my hair after washing.  This product has fantastic slip.  It really glides through my hair.  Loved the application of it.

Time to rinse.  It rinsed clean, and my hair felt well-moisturized afterwards.  I tried to leave a bit on my ends, since they are extra dry (almost time for a hair cut for sure!).

After styling with some curly mousse, I left it to totally air dry, rather than my usual method of drying the top with a dryer to speed things along.  I wanted to see if it would calm the frizz that I get around my scalp when I don't use a hair dryer to help that area out.


And boy did it deliver!  My curls are frizz free and shiny!  My normally frizzy scalp area is smooth and silky.  The scent did linger, like I mentioned earlier, but I don't mind that.  Most importantly, my hair feels very light.  This gives me hope that I can use this frequently on my fine hair.  I do not feel at all weighed down despite having very fine hair.  I will update on this particular aspect of the product though, as with more uses, I might get weighed down by it.

With one use, this product is a real winner.  I will update you guys later and post the link here when I do! Check it out on Amazon or you can find it at Target!

Friday, May 17, 2013

This or That: Mint Green Nail Polish (Essie Mint Candy Apple vs Wet n' Wild I Need a Refreshmint)

Hey guys! I'm back in action after an exhausting but productive exam series.  Since I am feeling in a very summery mood, I've got two nail polish blog posts for you.  This one will compare two mint green shades and the next post will compare two coral shades, since mint and coral are the colors to have this summer!

I'm comparing Essie's Mint Candy Apple with Wet n' Wild's I Need a Refreshmint.  These are two of the most popular colors in the stores right now, and let me tell you, it was a pain to find both!

Even though Mint Candy Apple is part of the regular line and not a seasonal shade, I must have struck out a good 10-15 times before finally spotting one lone bottle at my Walgreen's.  There are slots for this at Walgreen's, CVS, Wegman's (for you north easterners!), Target, and Walmart.  I'm sure there are others stores as well, but these are the ones I've personally checked.

Wet n' Wild's I Need a Refreshmint is a seasonal shade.  This means it's even trickier to find.  I ended up ordering it from drugstore.com during a 30% off all beauty items sale.  I also used Ebates, which I've posted about before, to get 6% cash back on that haul, which was awesome. Combine all that with the lower price tag on Wet n' Wild polishes compared with Essie polishes, and this one is a real winner if you're pinching your pennies.

COLOR

This
Mint Candy Apple is the quintessential mint green.  If you're looking for true mint green, stop reading here are start looking for this color.

That
I Need a Refreshmint is named as a mint green, but in truth, it's a bit off of mint green.  It has a hint of blue to it and it is not quite as bright as the Mint Candy Apple.  However, this color is still right on trend for spring, and for those who are not keen on wearing super bright colors, this color represents a toned-down version of mint green.

BRUSH

This
The Essie brush is small and flexible.  It is easy to maneuver, but I find that it contributes to some of the streakiness of the shade because you have to go over the nail many times in order to get a consistent coat.

That
The Wet n' Wild brush is huge! It looks a lot like the Sally Hansen Complete Manicure polish brush.  It is wide and wonderful, in my opinion.  I prefer big brushes like this because it takes less strokes to get the nail completely covered.  I think this brush is easier to work with and contributes to more even coverage.

APPLICATION
First coat. Mint Candy Apple is on top, and I Need a Refreshment is below.

This
Mint Candy Apple applies a bit streaky.  I expect this with lighter colors, but I think the small brush really contributes to this because of how many times you have to go over the nail.  I think that even with my fairly small nails, I had to apply a thicker, gloopier coat in order to get even coverage on the first coat.  The second coat covers up this streakiness, though.

That
I prefer Wet n' Wild's application.  The first coat was more even, though still somewhat streaky due to the nature of lighter colors.

FINISHED RESULT
Second coat. Essie on top, Wet n' Wild below
I'm happy with the finished result of both shades.  I think both formulas have shine on their own, though I'd probably top it with a top coat for staying power anyway.  The color came out even with both polishes.

THIS OR THAT?
To be honest, I think there is definitely room for both colors in anyone's collection.  There are similar, but they are just different enough that I can easily justify keeping both.  I can even see how easy it would be to use both in the same manicure.  If you like the ombre look, where the color subtly changes from nail to nail, these would look great right next to each other.  You could use one to do subtle polka dots or another pattern on top of the other.  You could use one as an accent nail.  The possibilities are endless.

But, since the blog post is called This or That, I'll make a selection.  I personally prefer the Essie shade. While I prefer the brush and lower price tag of the Wet n' Wild, the true mint green of Mint Candy Apple is just so perfect for spring and summer and so bright and cheery.  I can already tell that Mint Candy Apple is really going to pop against my mid-late summer tan.  If I had to give one of these colors up right now, I would say bye bye to the Wet n' Wild and hello to true minty goodness.

Saturday, April 27, 2013

Exam time

Hello all! I won't be posting any new blogs until May 12th because I've got exams until then.   Time to hit the books!  See you all on the other side.  Leave me a comment suggesting a post topic for when I'm not surrounding by notebooks and outlines!


Wednesday, April 24, 2013

How to Use Dew Points to Pick Your Hair Products

The media and beauty industry would have you believe humidity is what curlies should fear more than anything. Dew point, a cousin of humidity, is a much better indicator of how your hair will behave in given weather conditions. 

Humidity is a misleading number when dealing with haircare. Chances are, you know this intuitively already.  You know from experience that 100% humidity in the summer and 100% humidity in the winter are not the same feeling. This is because those numbers represent relative humidity. Also, 100% humidity in Arizona is very different from 100% humidity in Florida, even if we're talking about the same time of year.

Dew point is very easy to find out. Just check weather.com, accuweather, or any weather service for your dew point.  It'll be posted as a temperature, like 70 degrees.


Dew point is the temperature at which water will condense to form dew or fog.  20 degrees and 100% humidity means the dew point should be at 20 degrees (because the air is saturated). So dew point and humidity are related, but dew point helps you gauge how much moisture is really in the air more accurately, which can tell you a lot about what kinds of products to use.

Dew points are why a lot of curlies find that one product may be a holy grail in the summer, but results in flat, stringy curls in the winter.

What does all this mean for your hair?

Low Dew Points: Negative infinity through 30 degrees

  • This is the winter in my hemisphere. It is dry! If there is no moisture in the air, your hair cannot retain any. Your hair wants to be in equilibrium with its environment. This means that if there is no moisture in the air, and your hair has some, it will give up its moisture to the air. If the air around you has 0 figurative drops of water and your hair has 10 figurative drops of water, your hair will expel moisture until the air around it has 5 drops and it has 5 drops. This is the battle of winter. You have to continually replenish moisture because your hair will be continually giving it up to the dry air in low dew points. 
  • Deep treatments, rich conditioners, hair butters, creamy leave ins, and humectant-free products will help you in winter. 
  • Humectants are products which work to make that equilibrium between your hair and the environment happen faster and more efficiently. As we'll see, they are your friend in moderate dews, but your mortal enemy in low dews, because they will just be pushing moisture out of your hair and into the air! Common humectants are glycerin, panthenol, honey, propylene glycol, and vitamin B5.

Moderate Dew Points: 40-60 = moist and happy! 

  • This is a favorite time for many curlies. 
  • The air is now comfortably moist, so the air now has the 10 figurative drops, and your hair has 0 (well hopefully you've been taking better care of it than that so it isn't that dry, but this is for illustrative purposes). You want to use products that will help pull some of that moisture from the air into your hair.
  • Humectants will pull moisture into your hair to balance it out. Don't ignore your moisture treatments, but you can now use lighter products.

High Dew Points: 60 and up = muggy and 80s hair revival. 

  • Some curlies will outright skip rinse out conditioners. 
  • Humectants become somewhat dangerous here, because they can pull too much water into your hair, making it swell and poof. 
  • Here, you will want to use antihumectants. These ingredients are water repellents. Castor oil, beeswax, coconut oil, palm oil, olive oil, and shea butter are antihumectants. 
  • A hard hold gel will be your friend in these muggy conditions as well, as these gels create a barrier around hair strands, which will block some of the moisture from the air.

Sunday, April 21, 2013

Curly Hair Cuts: How to Talk to Your Stylist to Get A Great Curly Cut

Show me a curly haired person who says they've never had a bad haircut, and I'll show you a liar! At some point, we've all walked away from the hair cut chair with our nice blowouts, washed our hair the next day, and been pretty horrified by how our hair looked curly.  I've had my fair share of these experiences, and more importantly, I've figured out how to avoid them.  Here's some advice on how to find a curly hair stylist who will help end your bad hair cut blues and talk to them about what you really want!


1) How to find a stylist who knows what to do with curly hair
There are lots of tools available these days that can help you find a good stylist.

My biggest suggestion is to find someone with curly hair in your area, and ask who they go to.  Word of mouth is still the best way in my opinion to find a stylist.  It's a win-win, because you're probably going to make that curly's day by asking, and you get a helpful tip on who to see.

If you can't do that for some reason (big city, shy, whatever), start by looking for curly haired stylists who have special training.  Look for Deva trained stylists, or Ouidad trained stylists.  They have been through additional training specifically geared toward curly hair.  Remember, beauty schools focus on straight hair almost exclusively.  You want to find someone with extra training.

I've personally had a lot of experience with Deva stylists.  Deva is a company founded on the principles of the Curly Girl method (no harsh shampoos, encourage curls, etc).  Deva has its flagship salon in NYC and the company offers training and certification to hair stylists so that they can learn how to cut curly hair.  They use a dry cut method, which means that you show up with your hair curly, and they cut it without wetting it, curl by curl.  They then wash it, restyle it, and make adjustments to the cut.  It's definitely a unique process.

One thing to keep in mind though is that just because a stylist goes through the Deva training, that doesn't mean that they are going to be great curly hair cutters.  I could go get certified to do accounting, but that doesn't mean you should trust me with your funds, because I just don't get math.  Some stylists just don't get curly hair.  It's a different beast than straight hair, and needs different techniques.

Supplement this training info by checking online reviews
Check out the salon's Yelp page.  Google the stylist's name.  You know the drill!

Stay away from chain stores
The stylists in chain stores generally have quotas for the number of clients they must see in a given time period (hour, shift, etc).  Cutting curly hair is a unique thing and it takes time for the stylist to really develop a plan for what to do with your unique hair.  A standard cookie cutter haircut at a chain store just doesn't translate well to curly hair.  Most curlies are surprised when a Deva cut, for example, takes around an hour and a half to two hours to complete.

Don't ask the salon if they have someone who is good with curly hair
This is so silly, but so many people still do it! Of course the receptionist is going to tell you they have the Curl Whisperer in their salon! It's their job to help bring clients in.

Instead, ask what kind of additional training the stylists receive in cutting curly hair
Like I said, beauty school focuses on straight hair.  You want to know if a stylist has gotten additional education about cutting curly hair.  Ask the salon receptionist what curl-friendly products they carry.  If they don't have a curl line but offer to tell you all about their straightening products, what does that tell you?

2) Once you've found someone promising, schedule an appointment for a hair cut, but think of this first appointment as a consultation first, hair cut second
You need to let the stylist see and touch your hair, but importantly, you also need to make sure they're going to cut it in a way you feel comfortable.  I personally have a rule that I prefer a curly stylist to actually have curly hair herself, so I generally ask her if her hair is straight that day whether she has naturally curly hair herself.  It's hard to explain your curly concerns to someone who has never lived with them!

Do not be afraid to get out of the chair if you are not comfortable.  You're a paying customer.  You might offend the stylist that day, but you have to live with your hair however they were going to cut it! I've gotten out of a chair before when the stylist pulled out the thinning shears.  I said that I didn't want her to use those on my hair, and she said I should trust her.  I said I wasn't comfortable continuing in this appointment, and I left.  You have to be comfortable with what they are doing, first and foremost

3) Curly hair cut tips and tricks that you should know

  • Be specific.  Don't say you want a trim.  Tell your stylist that you want 1/2 an inch off.  But even that isn't specific enough! You need to specify whether you mean 1/2 inch when your hair is wet/stretched out, or 1/2 inch off of the curly length.  Half an inch on wet or straight hair can translate to a totally different length when dry and curly
  • Curly hair needs some layering, but this is dangerous territory!  Tell the stylist that you want long layers but to keep the angle at 45 degrees.  They should not raise you up to 90 degrees.  This refers to the angle at which they cut the hair.  This is how you avoid triangle hair
  • Get up out of the chair and leave if they want to use razors or thinning shears.  These generally are very bad for curly hair.  I'm sure there's an exception to every rule, but I've yet to find one for this rule
  • Ask your stylist to avoid giving you stringy ends by leaving you with a solid base. 
  • Tell your stylist how you style your hair.  Do you wear it curly every day without fail? Do you occasionally straighten? When you style, are you trying to elongate your curls? Encourage them? Get more volume or less volume?  All this info should be valuable to a stylist who knows how to work with curly hair.
I hope this is helpful for your next hair cut!  Remember, you have the control over the hair cut.  Stop the stylist if you're not comfortable.

Wednesday, April 17, 2013

Hair Care Gift Ideas for Mother's Day

Mother's Day is one of those holidays that always sneaks up on me.  I've been trying to be better about that in recent years though.  Since I'm an only child, I feel like I've got a lot of pressure to give my mom a great gift.

1) A luxurious deep conditioner

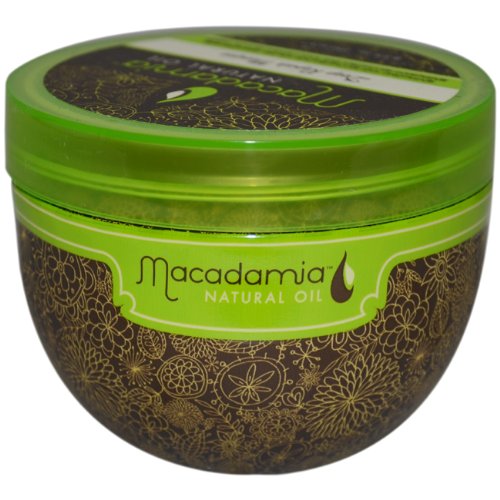
If your mom is like mine, her hair has been color treated for as long as you can remember! My mom uses at home permanent hair color (Revlon Colorsilk) which really dries out her hair.  So a few years ago, I bought her a Macadamia Oil Deep Repair Masque.  She loves that stuff now!  She has straight hair, but I think this would be good for curly moms who aren't watching their silicones.  She loved it so much that she now asks for a new one in her Christmas stocking every year!  You can grab this online or in some drugstores (I've seen it in my Target, for example)

2) Help her pamper herself with a spa-like environment for that deep conditioner

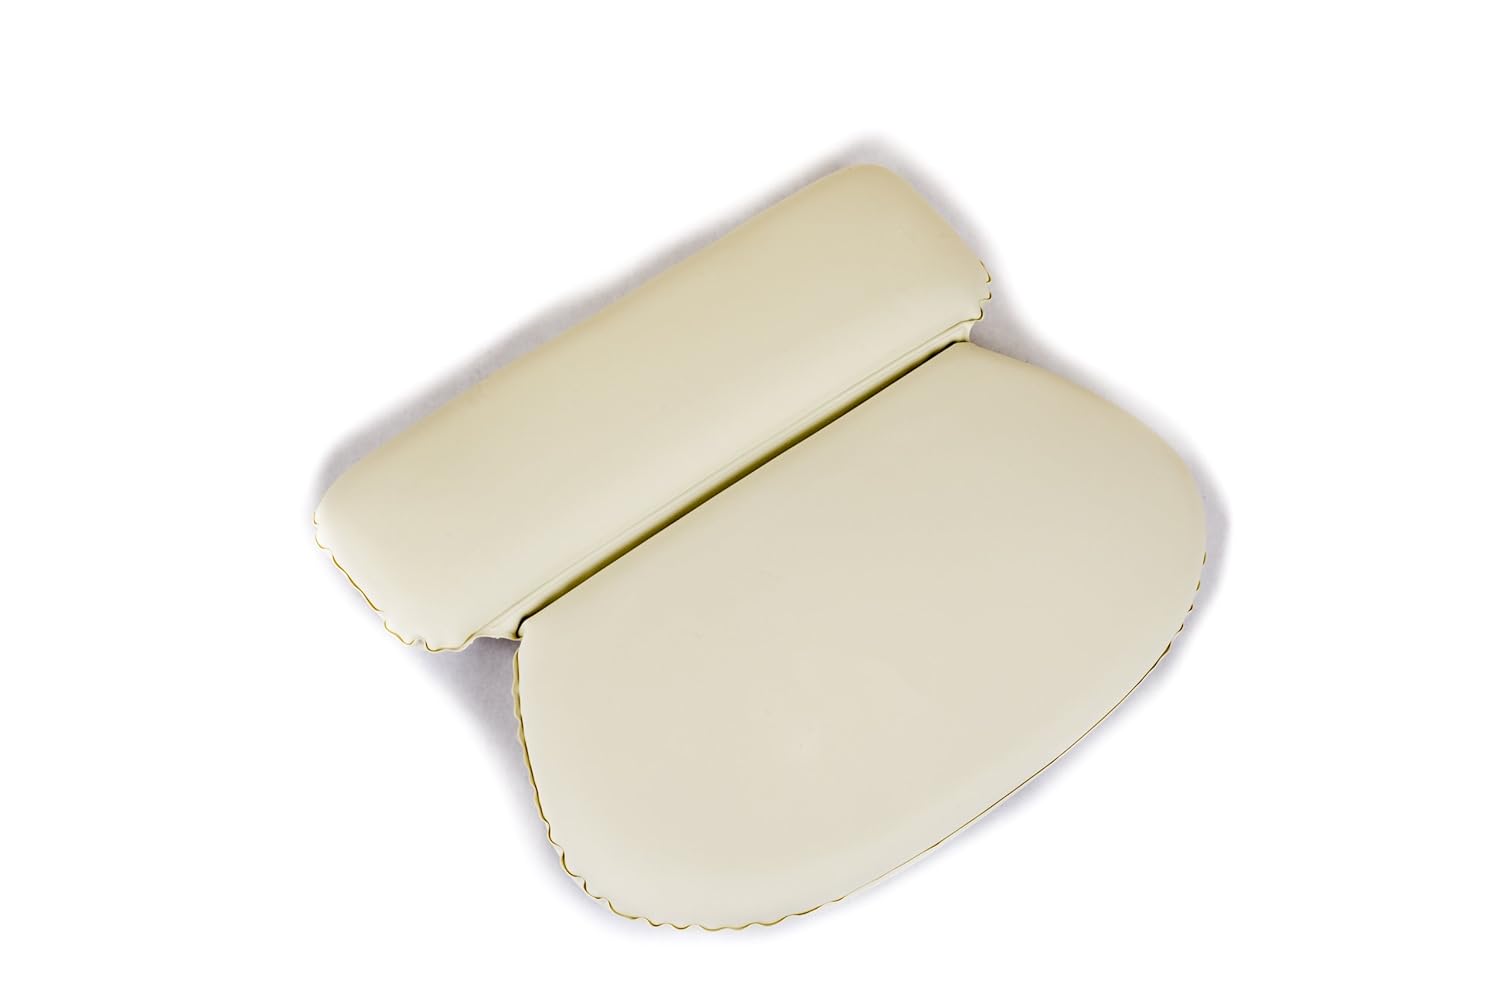
Three words: bath tub pillow.  If your mom is like mine, she has a bathtub that never gets used, because she's a shower-and-go kind of gal.  But that won't work if she's trying to relax and give herself a lovely deep treatment.  So last year, I bought her this bathtub pillow.  Now, she loves to draw up a bath every once in a while.  This pillow is super dense and suction-cups to the bathtub so it stays put.  I know this one isn't technically hair care, but it definitely encourages you to sit and let your deep treatment work its magic for a while!

3) Upgrade her hair dryer

This one is on my list this year.  My mom uses one of those tiny little hotel hair dryers that folds up and has two speeds: on and off.  The funny part is that she doesn't travel with it! She borrows mine whenever she comes to visit me at school.  So I have a feeling she's going to love getting one of her own.  I am going to grab her this one by Babybliss. I love my own Babybliss.  It dries my hair so much faster than any other dryer I've owned and it doesn't scorch my hair like some other dryers have.  This dryer is under $40, so it's a gift with a big impact on your mom's daily routine that is still budget-friendly!

4) Upgrade her brush set
If your mom has been using the same hair brush from Walmart since 1998, maybe it's time to grab her some professional brushes.  I love my Denman brush ($12) for detangling and encouraging curls.  It really cuts down on damage because it doesn't have those little plastic balls on the ends of the spokes that snag and break hair.  When I want to give myself a blowout, I love this brush ($12).  The vents really cut down on drying time.  So for $24, you can give your mom two brushes that she can use every day!

5) Fun hair accessories


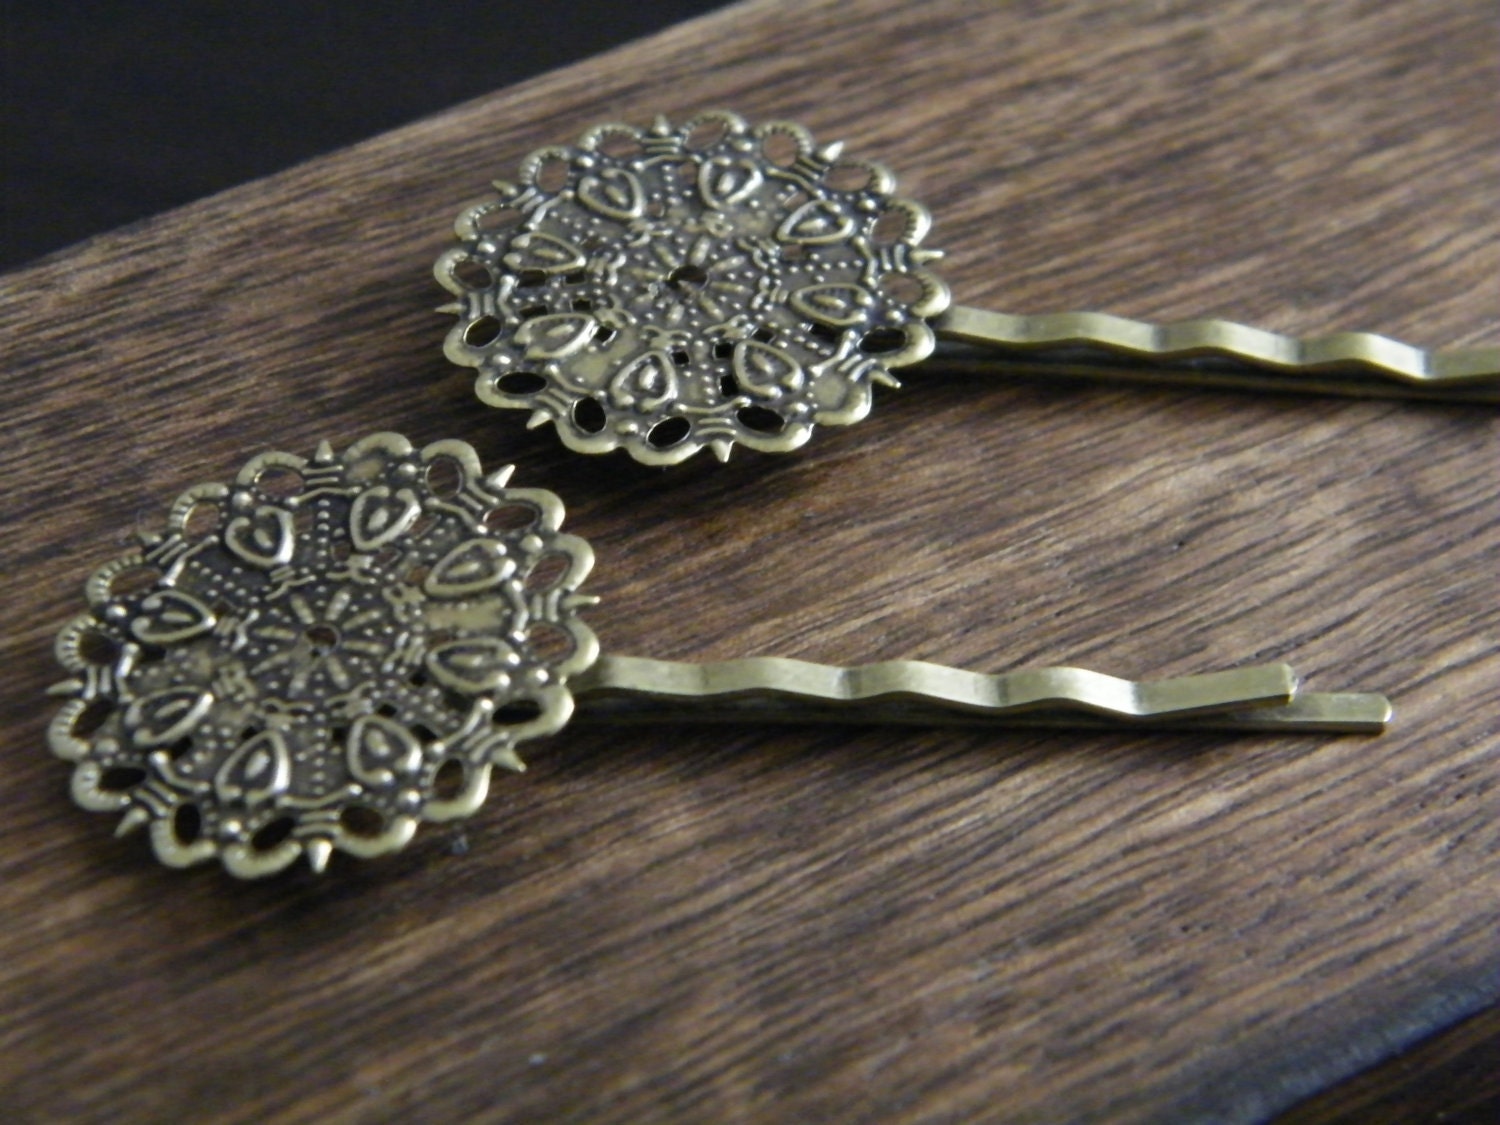
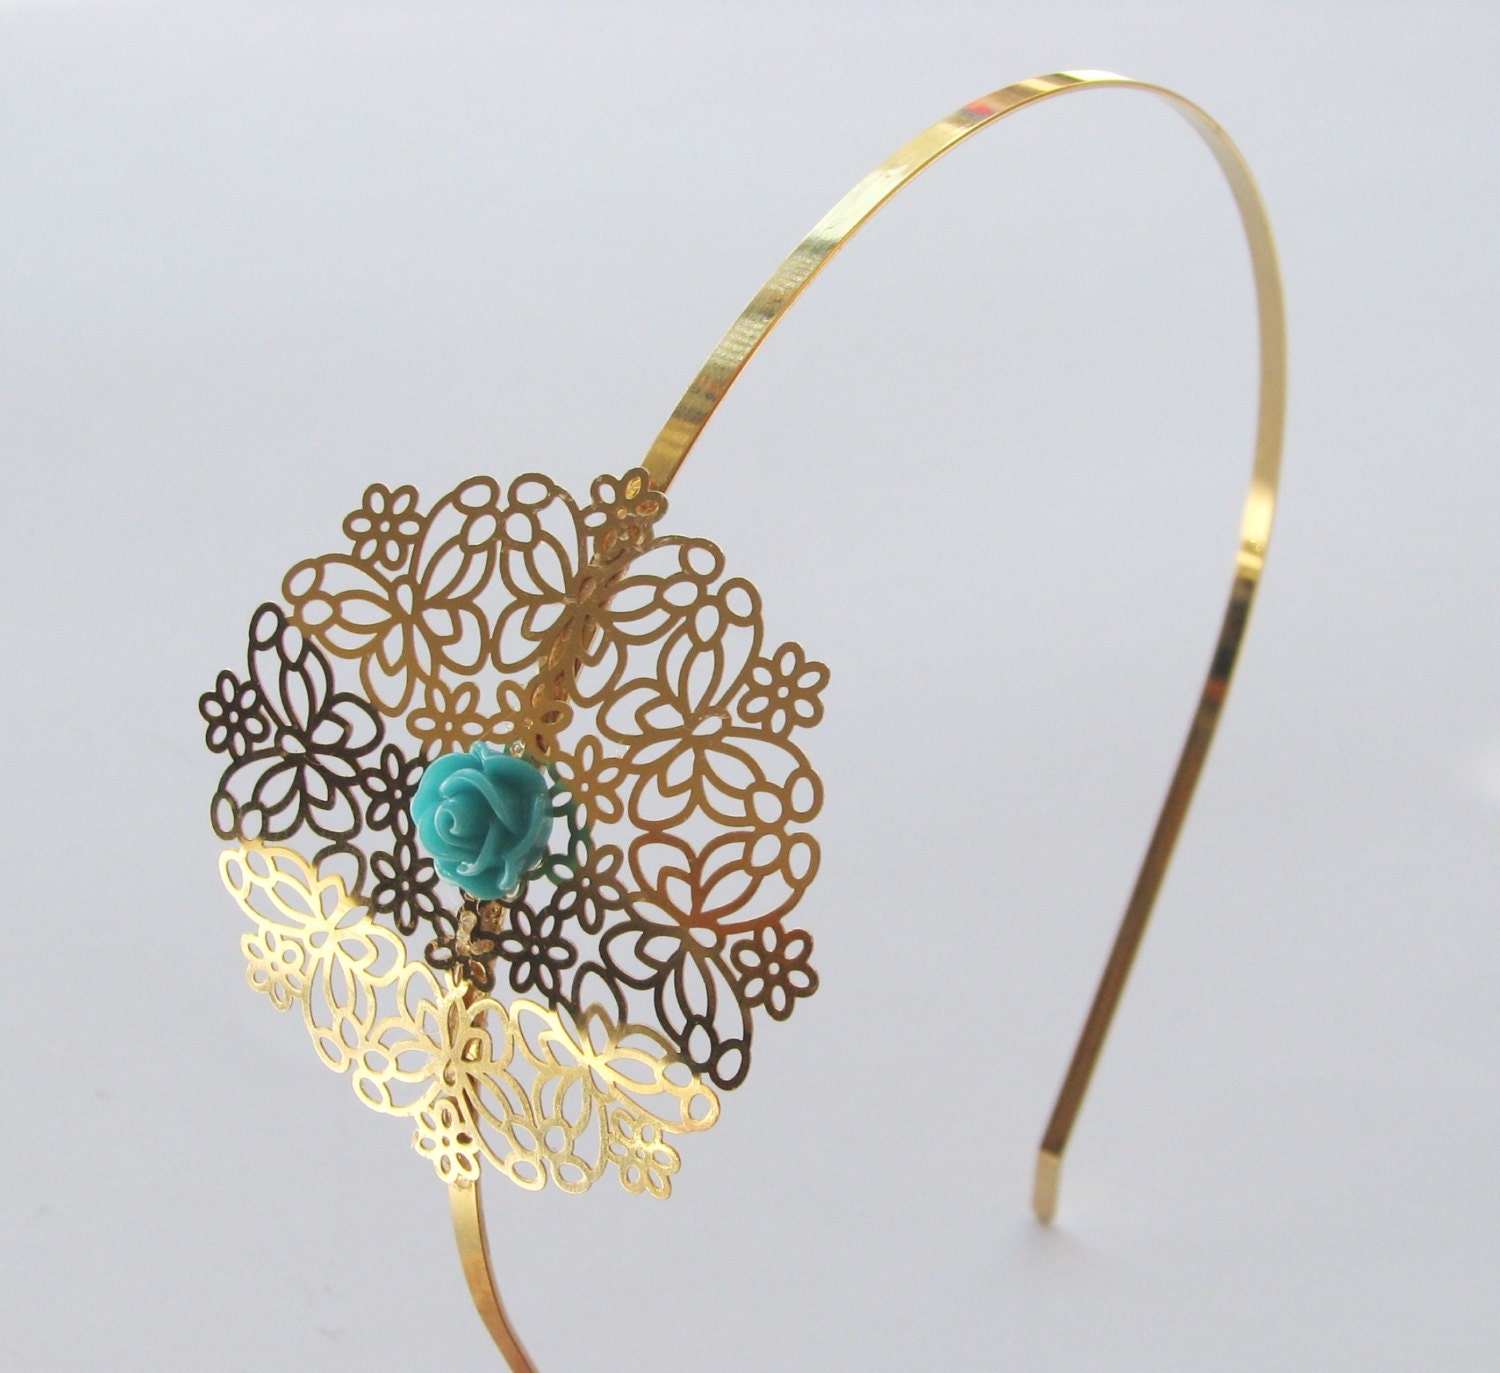
Check out Etsy's huge selection of hair accessories that are made by hand! There are so many that I know my mom would love, even as a working professional.  How gorgeous is this metal hair band?  Or these jazzed up bobby pins?  You can feel good about supporting a hand-crafter and get gorgeous stuff that will give your mom some options other than the pony tail holder.

Friday, April 12, 2013

Review: CoverGirl Clump Crusher Mascara

Happy Friday!

I've got a quick mascara review for you guys.  This has been one of the most hyped up products of the year, and I had to know if it was worth it.

My go-to mascara is Covergirl Lash Blast (the original, non-waterproof formula in the orange tube).  So I was coming in to trying this mascara with high hopes because I really love that formula and brush.

The tube is exactly like the Lash Blast tubes, but a cute, bright green this time.


The brush, however, is very different.  It's still a pretty large synthetic bristle brush, but it's got a scoop in it.  The bristles are a bit longer than the Lash Blast bristles, so that's good news for those who found that the Lash Blast didn't separate their lashes well. 


I'm going to go out on a limb here and guess that the brush is the biggest, if not the only, change to this mascara compared with the Lash Blast formula.  This mascara claims to separate your lashes completely, giving you a totally clump free look.  I think the brush goes a long way to doing that.

I've been using this for a couple of weeks now, so the formula has had a little time to dry up a bit.  I tend to like a drier formula for my lashes.  I would say that I have pretty long lashes naturally, so what I really look for in a mascara is some plumped up volume.

I am really enjoying this mascara.  I think it delivers on its clump-free promise.  But lots of mascaras do that, so why buy this one?  I think that the formula is really buildable, which I love.  I find I can keep going back over it and build volume without getting that spider lash look.  The photos below are the product of many swipes of the mascara.  I didn't really count coats since I don't wait for one coat to dry before applying more, but I spend about 30 seconds with each I would guess.

I find that I get the best separation when I use the scoop side of the brush.  I think it fits in well with my eye shape, and as you can see below, I can get those tiny lashes at my inner corner no problem.  The definitely a winner in my opinion.  

Side note: don't you wish you could buy mascara brushes separately? Like, I'd love to use this brush with another mascara whose brush I don't like so much.  

I would not recommend this for lower lashes.  I don't wear lower lash mascara during the day, but I think this mascara would probably give you flakes if worn on the bottom because I do notice a tiny bit of flaking at the end of the day with this.  Nothing that a quick tissue swipe can't take away, and by the time I notice the flakes, I'm ready to take the mascara off anyway.


Bottom Line:  I think this one is a winner, and I think I might actually like it better than Lash Blast because of the awesome brush.  I find that the formulas perform very similarly though, so if you didn't love the formula of any of the Lash Blast mascaras, this one might not be for you.  You can get this mascara for around $7 at your drugstore, or you can grab it for $5.59 on Amazon!

Have you tried this mascara? Let me know what you think!

Tuesday, April 9, 2013

Review and Swatches: Maybelline Color Whisper in Pin Up Peach

It seems like the cosmetics industry had an epiphany, and it's one that I am thrilled about!  They seem to have all discovered that, actually, we really don't like lip products that are dry and cakey and make our chapped lips worse!  Imagine that!

So now every company has a lip butter/tinted lip balm/balm color stick/you name it.  The object of the game is the same for each of these products: provide some actual color payoff while being comfortable on the lips, and maybe even good for the lips.

Here is Maybelline's contender in this game.  They are called the Color Whispers.  The official Maybelline description is that they provide pure color pigments suspended in a weightless gel without waxes or heavy oils.  As of this blog post, there are currently 20 shades that run the gamut from very sheer pinks to deep berry shades.  You can check out the full shade range on their site here.

I'm always on the hunt for the next best "your lips but better" shade, so I decided to start off with Pin Up Peach.

Size comparison: Maybelline Color Whisper on the left
and Revlon Lip Butter on the right
Packaging: Pretty standard.  I like the size, especially compared with the bulkier Flower Lip Butters I've reviewed.  The one downside is that the tube wasn't very well sealed in the store.  I was able to open tubes in the store, which might be cause for concern.  I'm not sure if that was just an issue at my store or not though.

Color: I loveeeeeeee this shade!  It's very fresh for springtime while still being very wearable and neutral for an office environment or a school environment.  There is no shimmer in this color.  It has a creamy finish.  In indoor lighting, it matches up better with its name and looks like a peachy pink shade.  In natural light, the pink tones come through a bit more.

Indoors
By a sunny window

Application: I love the way that this applies.  You definitely do feel like you're applying some kind of weightless gel.  It feels very smooth.  I would say that these are actually smoother on application than the Revlon lip butters.  The most notable thing about the application is that you can really build up color, which brings me to...

Pigmentation:  I think that these are the most appropriately named lip products (based on my one shade experience, anyway).  It starts off as just a whisper.  With one swipe, you'll get a sheer wash of the color.  However, just like a whisper in real life can easily build into a full on conversation, these are super buildable.  The more pigmented swatch was three swipes (all in the same direction, so no rubbing back and forth).  

Left = 1 swipe
Right = 3 swipe
Lasting power: These are comparable to the Revlon lip butters in terms of staying power to me.  I think I get longer wear from my Flower lip butters, but those are also a bit less pleasant as far as their texture is concerned (they are a bit gritty at times).  I'm happy to reapply this every few hours or after I eat because it's very comfortable, and I don't feel like I need a mirror since it applies evenly.

Bottom line: I think what says it all is that I've been wearing this shade by itself every day since I bought it.  It's a fresh, spring time peachy pink that is still super wearable and office/school appropriate. It feels great on the lips, applies evenly, and builds up color like a dream.  I will absolutely be buying more of these.

Sunday, April 7, 2013

My Secret Weapon for Dark Circles: Review of Pixi Correction Concentrate Concealer in Brightening Peach

I have hereditary dark circles under my eyes.  I get at least 7 hours of sleep every night, I carry a water bottle everywhere, and I am good at managing my stress levels.  No matter what I do, though, I am always going to have my mom's very blue toned dark circles under my eyes.

Accepting that, I'm always on the look out for concealers that work well under the eyes.  In order to counteract the blue tone of dark circles, makeup artists recommend using a pink toned concealer.  The problem is, pink concealers at the drugstore are pretty much non-existant, and I'm a student on a budget.

Last year though, I picked up Pixi's Correction Concentrate Concealer from Target.  It's $15, which is expensive as far as drugstore stuff goes, but it is easy to find and, hey, it's still less expensive than the Bobbi Brown or Benefit concealers I've sampled in the past.  You can also get it for $15 and free shipping from Amazon, so depending on if you live in a state that taxes Amazon purchases, you might actually get it tax free (and thus cheaper) on Amazon.


This concealer/corrector only comes in one shade: Brightening Peach.  I would call it a salmon toned concealer.  Don't judge it by the color you see on the box, because that picture looks skin-toned to me, but the concealer is definitely salmon-toned.
See what I mean about the package showing you flesh toned
when it's actually peachy pink?
By the window on a somewhat cloudy day
Indoors
This stuff rocks! I use it everyday.  I apply this to bare skin under my eyes, then I apply my Maybelline Instant Age Rewind Dark Circle Eraser concealer over it to match my skin tone.  This is the one under eye concealer from the drugstore that I have found that truly brightens up my dark under eye area.

The key to this product is to warm it up first.  I apply it with my fingers.  I normally like to apply products with brushes, but this is a fingers-only product in my opinion.  You need that warmth to get it to be a texture that you can easily smooth on.

Only use a tiny, tiny bit.  This pot that I'm working on now has been in use for about a week, and you can barely tell I've used it.  If you apply too much, you will find it getting cakey.

A picture is worth 1000 words, so here is the before and after!  I recognize that some of you might look at my circles and think, "Ha! What circles?" Trust me, it's hard to capture that blue tone on camera.  They are there, and they are hard to cover.

Before: Bare skin, sorry for the half blink!
After! Eye circles are pretty much covered, whole area is brighter

Have you got any favorite under eye concealers or treatments? Leave them in a comment!  

Friday, April 5, 2013

Calming the Product Junkie Part 2: Test Products Intelligently to Find the Best Products For Your Hair

Last week, I talked about how getting to know your hair at more than a superficial level is critical to being able to make informed decisions about what products to buy for your hair.  This week, I'm going to get a little science on you and talk about how to test out products once you've bought them.

She might be changing too many things in this experiment.
But at least her curls look fab!
1) Change one thing at a time
This is experimenting 101!  If you change more than one thing about your hair routine in one go, you won't know which product to praise for the good results and blame for the bad results.  For example, if I normally use Product A, but today I switch it up and use my new Product B and Product C because I just got them and I'm so excited to use them, and I get the best hair day ever, I won't know whether Product B or Product C is at work.  This isn't to say that it isn't possible that both products working together made that great hair day.  But I could very easily get trapped into thinking, "If I want great hair, I must use Product B and Product C."  But what if Product B is the one that is actually making your hair look great and Product C is just sitting there?  You're spending money repurchasing Product C when it isn't really necessary.

There are lots of variations on this story.  What if you change your conditioner and a product? You love the way the conditioner feels on your hair, but you don't like the results.  You're probably going to blame the product, rather than the conditioner.  But it could very well be the conditioner that gave you the bad results!  That's going to make you spend more money on products when the real culprit is the one in your shower.

The moral of the story: even when you really want to try a bunch of new products you just bought, slow down! Keep everything you're already doing the same, and just change one piece of the puzzle.

2) Give products more than one use before you decide how you feel about them
Every curly girl knows that our hair can sometimes act like a natural barometer, letting us know when it's more humid today than yesterday.  Knowing that the weather can affect your hair, why would you only give a product one use before putting it in your "Never Use Again" bin?

Our hair is susceptible to so many different things.  Weather, hormones, products, and even activity level can totally change how your hair looks on a given day.  Since the goal with trying new products is to get the variables in play down to just one (the new product itself), you should give products more than one use before you decide you don't like them.

That being said, I know it's hard when you suspect that a certain product is to blame for your bad hair day to put it on again.  It feels like you're giving in to having another bad day.  But I think you'll be surprised that the results will often be different.  Even if the results aren't different, take note of what your weather was like that day, and try the product again on a day with different conditions.  Hate a product in July? Stash it until December when it's drier.

3) Be realistic about what a given product can do
The idea of the Holy Grail Product is a fun one.  Just keep searching, you'll find that one product that makes your hair perfect every day, they say.

Here's a loving reality check.  Remember how I just said that there are a ton of variables affecting how your hair looks on any given day?  Now, just tackling it from common sense, do you think that there is really going to be just one thing that can handle all of those variables, year round?

Sometimes, there is.  I can pretty much count on my Suave Captivating Curls mousse year round if I know what to layer it with, for instance.  But more often than not, you need to learn to adjust what you're using to the conditions presented on a given day.  I add gel when it's super humid.  It's a must.  Otherwise, my fabulous mousse won't give me the same results I get in December.

This isn't meant to be a downer.  This is meant to be an eye opener.  When we pin our hopes and dreams of perfect hair on one bottle, we're not giving that product a fair evaluation.  If you can give a product a fair evaluation, you're more likely to make a realistic judgment about whether it's something that you can make work for you, even if you don't end up repurchasing it.  The goal is to use products you buy, not just try them once and then go buy more!