Showing posts with label makeup. Show all posts

Friday, April 12, 2013

Review: CoverGirl Clump Crusher Mascara

Happy Friday!

I've got a quick mascara review for you guys.  This has been one of the most hyped up products of the year, and I had to know if it was worth it.

My go-to mascara is Covergirl Lash Blast (the original, non-waterproof formula in the orange tube).  So I was coming in to trying this mascara with high hopes because I really love that formula and brush.

The tube is exactly like the Lash Blast tubes, but a cute, bright green this time.


The brush, however, is very different.  It's still a pretty large synthetic bristle brush, but it's got a scoop in it.  The bristles are a bit longer than the Lash Blast bristles, so that's good news for those who found that the Lash Blast didn't separate their lashes well. 


I'm going to go out on a limb here and guess that the brush is the biggest, if not the only, change to this mascara compared with the Lash Blast formula.  This mascara claims to separate your lashes completely, giving you a totally clump free look.  I think the brush goes a long way to doing that.

I've been using this for a couple of weeks now, so the formula has had a little time to dry up a bit.  I tend to like a drier formula for my lashes.  I would say that I have pretty long lashes naturally, so what I really look for in a mascara is some plumped up volume.

I am really enjoying this mascara.  I think it delivers on its clump-free promise.  But lots of mascaras do that, so why buy this one?  I think that the formula is really buildable, which I love.  I find I can keep going back over it and build volume without getting that spider lash look.  The photos below are the product of many swipes of the mascara.  I didn't really count coats since I don't wait for one coat to dry before applying more, but I spend about 30 seconds with each I would guess.

I find that I get the best separation when I use the scoop side of the brush.  I think it fits in well with my eye shape, and as you can see below, I can get those tiny lashes at my inner corner no problem.  The definitely a winner in my opinion.  

Side note: don't you wish you could buy mascara brushes separately? Like, I'd love to use this brush with another mascara whose brush I don't like so much.  

I would not recommend this for lower lashes.  I don't wear lower lash mascara during the day, but I think this mascara would probably give you flakes if worn on the bottom because I do notice a tiny bit of flaking at the end of the day with this.  Nothing that a quick tissue swipe can't take away, and by the time I notice the flakes, I'm ready to take the mascara off anyway.


Bottom Line:  I think this one is a winner, and I think I might actually like it better than Lash Blast because of the awesome brush.  I find that the formulas perform very similarly though, so if you didn't love the formula of any of the Lash Blast mascaras, this one might not be for you.  You can get this mascara for around $7 at your drugstore, or you can grab it for $5.59 on Amazon!

Have you tried this mascara? Let me know what you think!

Tuesday, April 9, 2013

Review and Swatches: Maybelline Color Whisper in Pin Up Peach

It seems like the cosmetics industry had an epiphany, and it's one that I am thrilled about!  They seem to have all discovered that, actually, we really don't like lip products that are dry and cakey and make our chapped lips worse!  Imagine that!

So now every company has a lip butter/tinted lip balm/balm color stick/you name it.  The object of the game is the same for each of these products: provide some actual color payoff while being comfortable on the lips, and maybe even good for the lips.

Here is Maybelline's contender in this game.  They are called the Color Whispers.  The official Maybelline description is that they provide pure color pigments suspended in a weightless gel without waxes or heavy oils.  As of this blog post, there are currently 20 shades that run the gamut from very sheer pinks to deep berry shades.  You can check out the full shade range on their site here.

I'm always on the hunt for the next best "your lips but better" shade, so I decided to start off with Pin Up Peach.

Size comparison: Maybelline Color Whisper on the left
and Revlon Lip Butter on the right
Packaging: Pretty standard.  I like the size, especially compared with the bulkier Flower Lip Butters I've reviewed.  The one downside is that the tube wasn't very well sealed in the store.  I was able to open tubes in the store, which might be cause for concern.  I'm not sure if that was just an issue at my store or not though.

Color: I loveeeeeeee this shade!  It's very fresh for springtime while still being very wearable and neutral for an office environment or a school environment.  There is no shimmer in this color.  It has a creamy finish.  In indoor lighting, it matches up better with its name and looks like a peachy pink shade.  In natural light, the pink tones come through a bit more.

Indoors
By a sunny window

Application: I love the way that this applies.  You definitely do feel like you're applying some kind of weightless gel.  It feels very smooth.  I would say that these are actually smoother on application than the Revlon lip butters.  The most notable thing about the application is that you can really build up color, which brings me to...

Pigmentation:  I think that these are the most appropriately named lip products (based on my one shade experience, anyway).  It starts off as just a whisper.  With one swipe, you'll get a sheer wash of the color.  However, just like a whisper in real life can easily build into a full on conversation, these are super buildable.  The more pigmented swatch was three swipes (all in the same direction, so no rubbing back and forth).  

Left = 1 swipe
Right = 3 swipe
Lasting power: These are comparable to the Revlon lip butters in terms of staying power to me.  I think I get longer wear from my Flower lip butters, but those are also a bit less pleasant as far as their texture is concerned (they are a bit gritty at times).  I'm happy to reapply this every few hours or after I eat because it's very comfortable, and I don't feel like I need a mirror since it applies evenly.

Bottom line: I think what says it all is that I've been wearing this shade by itself every day since I bought it.  It's a fresh, spring time peachy pink that is still super wearable and office/school appropriate. It feels great on the lips, applies evenly, and builds up color like a dream.  I will absolutely be buying more of these.

Sunday, April 7, 2013

My Secret Weapon for Dark Circles: Review of Pixi Correction Concentrate Concealer in Brightening Peach

I have hereditary dark circles under my eyes.  I get at least 7 hours of sleep every night, I carry a water bottle everywhere, and I am good at managing my stress levels.  No matter what I do, though, I am always going to have my mom's very blue toned dark circles under my eyes.

Accepting that, I'm always on the look out for concealers that work well under the eyes.  In order to counteract the blue tone of dark circles, makeup artists recommend using a pink toned concealer.  The problem is, pink concealers at the drugstore are pretty much non-existant, and I'm a student on a budget.

Last year though, I picked up Pixi's Correction Concentrate Concealer from Target.  It's $15, which is expensive as far as drugstore stuff goes, but it is easy to find and, hey, it's still less expensive than the Bobbi Brown or Benefit concealers I've sampled in the past.  You can also get it for $15 and free shipping from Amazon, so depending on if you live in a state that taxes Amazon purchases, you might actually get it tax free (and thus cheaper) on Amazon.


This concealer/corrector only comes in one shade: Brightening Peach.  I would call it a salmon toned concealer.  Don't judge it by the color you see on the box, because that picture looks skin-toned to me, but the concealer is definitely salmon-toned.
See what I mean about the package showing you flesh toned
when it's actually peachy pink?
By the window on a somewhat cloudy day
Indoors
This stuff rocks! I use it everyday.  I apply this to bare skin under my eyes, then I apply my Maybelline Instant Age Rewind Dark Circle Eraser concealer over it to match my skin tone.  This is the one under eye concealer from the drugstore that I have found that truly brightens up my dark under eye area.

The key to this product is to warm it up first.  I apply it with my fingers.  I normally like to apply products with brushes, but this is a fingers-only product in my opinion.  You need that warmth to get it to be a texture that you can easily smooth on.

Only use a tiny, tiny bit.  This pot that I'm working on now has been in use for about a week, and you can barely tell I've used it.  If you apply too much, you will find it getting cakey.

A picture is worth 1000 words, so here is the before and after!  I recognize that some of you might look at my circles and think, "Ha! What circles?" Trust me, it's hard to capture that blue tone on camera.  They are there, and they are hard to cover.

Before: Bare skin, sorry for the half blink!
After! Eye circles are pretty much covered, whole area is brighter

Have you got any favorite under eye concealers or treatments? Leave them in a comment!  

Thursday, March 7, 2013

Life as a Product Junkie: How to Save Money on Hair and Beauty Products


Life as a curly girl who loves her beauty products can get expensive.  About a year and a half ago, I signed up with mint.com because Mint allows you to see exactly what your money is going to every month.

Well, that was an eye opener! The first month, I would say about a third of my money was spent on random hair and makeup purchases.  So I determined to cut back.  I discovered that there are so many different ways to reduce your spending on cosmetics and hair products without having to quit cold turkey.

Shopping Smarter
I used to wander into a Walgreens or Target, pick something up, and buy it.  Those little here and there purchases seem innocent enough, but they add up so quickly!

The first thing I did was start to check prices for things I know I love online.  For instance, I've used Aveeno Daily Moisturizing Body Wash for years.  According to walmart.com, the going price for a bottle is $4.97.  Well that's not that expensive, right?  But if I buy it on Amazon, I can get a two pack for $7.83, and I get free shipping if my order is over $25.  So that means I buy 4 two-packs at a time.  That comes out to $31.32 for 8 bottles.  At Walmart, to buy 8 bottles would cost me $39.76.  Plus I would have to actually go to Walmart and buy it, costing me gas money and time.  Eight bottles easily lasts me a year.  So I'm set on body wash and don't have to worry about it until next year.

The lesson here? Comparison shop online and buy in bulk when you can with items that you know you love.

If you haven't tried an item yet, don't buy a full size! Sample a product at places like Sephora and Ulta before committing.  Read reviews, but don't read them blindly.  It's important to find someone who has a similar hair type for hair products, or a similar skin type/tone for makeup products.  If I tell you a product is great for my dry skin, but you have really oily skin, don't just rely on my review! Find another reviewer with oily skin on a place like makeupalley.com before you buy!

Get Paid to Shop Online

One word: Ebates!  Ebates.com is a site that gives you a refund on your online purchases.  The refund percentage usually ranges from 3-6%, but they have double refund days and promotions like that frequently.

All you have to do to start saving online is sign up (it's free), and when you are ready to shop online, head to Ebates and see if the site you're using is listed.  They have all the reputable online stores that could ask for.  It's really rare that a site I want to buy from isn't on Ebates. Then just click on the Ebates link to go to the store.  Make your purchase, then Ebates will email you a few days after your items have shipped letting you know that they've verified that you made a purchase.  Ebates will send you a check for your refund amount each pay period (pay periods are a couple months in length).

I know it seems to good to be true, but it isn't! I have received refund checks and deposited them without issue. The hardest part about Ebates is remembering to go to the site before you purchase.  So I put a link in my browser memory bar so that hopefully I see it.  There's literally no reason not to use Ebates when you shop online.

Click here to sign up for Ebates

Take Advantage of Discount Stores
I am a proud TJMaxx and Marshall's and Ross addict.  Each of these stores has a hair and beauty section, and you are missing out if you aren't taking advantage.

For example, I love Joico hair products. They cost around $16-20 a bottle from places like Ulta.  Yikes!    But I can usually find a larger size at one of these stores for half the price.  My stores usually also carry brands like Giovanni (a curly girl friendly line), Tigi, and Alba.  In the makeup and beauty department, my TJMaxx almost always has some Essie nailpolishes (retail $8) for $3.99.  And I often see eyeshadow kits and makeup gift sets on sale too.  I make it a point to check these areas every time I go.

Never Pay Full Price
There are too many ways to avoid paying full price for hair and beauty items to ever allow yourself to pay.

1) If buying online, check for coupon codes.  Retailmenot.com is my personal favorite
2) Check manufacturer Facebook pages and Twitters.  They often run giveaways and give out coupons to followers.  For instance, this week L'oreal's facebook page is giving away 10,000 boxes of hair color a day.  Your odds of winning are pretty darn good!  Also this
3) Contact the manufacturers! I can't tell you how many times I've gotten a free sample or a coupon for a free product by asking for one.  Companies want you to become loyal buyers.  If you contact their customer service about trying a product, they are usually more than happy to help you out.
4) Use online coupon sites.  Sites like coupons.com and flamingoworld.com offer printable coupons for your drugstore trips.
5) Sign up for manufacturer emails. This one is self explanatory, but perhaps a little annoying. But if you use Gmail, you can set up a mail filter to have all your "junk mail" get marked as read and moved out of your inbox. That way you can easily go find a coupon when you need one, and it's super easy to delete the junk mail all at once since it's in its own folder.

For True Online Power Shoppers
If you aren't a member of Amazon Prime, I've got only one question: Why not?!?!

For $79 per year (or only $39/year if you have a .edu address), you get free two day shipping and $3.99 one day shipping on any order.  I love Amazon because they are reliable, they have the best darn customer service out there, and they are usually cheaper than any other online place.  Prime also gives you access to streaming movies and TV shows, which is awesome.  Also, one secret that they aren't so open about is that you can share your membership with up to 4 people in the same household, or up to 4 coworkers.  I cannot recommend getting Prime enough if you are an avid online shopper.

What are your favorite ways to save money on hair and beauty products?  Leave a comment below!

Tuesday, February 26, 2013

Review: Flower Cosmetics Lighten Up Brightening Concealer

So you guys know that so far I've tried the Flower Beauty blusher/bronzer duo, two Flower nail polishes, and two of the Flower lip butters and have been pretty happy with all of them.

Well...I hate to break a streak, but I have been trying out the Flower Cosmetics Lighten Up Brightening  Concealer over the past few days, and I'm sorry to say that this one isn't a favorite.

What I look for: In a concealer, I'm looking for pigmentation, blendability, and effectiveness.  I have some pretty blue under eye circles, and I need those to get covered easily and effectively.  I also have some redness around my nose that I conceal daily.

Packaging: This concealer has the twist-up into a brush style packaging.  The brush bristles are long and flexible.  I hate applying concealer with a brush like that (I prefer using a Sigma P80 or P86 brush) so I just use the applicator to get the product onto my skin and work from there.


Color Selection: 4 colors. That's it.  To fit all the range of skin tones that need concealer.  Yeah.  The shade I'm using is BC2, which is the second lightest shade.

Application:  I did not find this to be especially smooth with application.  Check out these swatches.  In the second picture after I had rubbed it into my skin a little bit, you can pretty clear see some little bumps of product.  I've found that lumpy texture to be pretty typical of this product.

Straight out of the brush tip
Blended out with 4-5 swipes back and forth.
Those little lumps are the concealer..not texture on my hand.
Coverage: You won't be able to use this for spots in my opinion unless they are very light.  It just isn't that kind of concealer.  I get the sense that this is meant for under eyes only.  That's fine.  Except that I don't find it does a lot for me for under eyes!  Check out the before and after:

Completely naked skin

No foundation, just the Lighten Up concealer under my eye and
blended out/down. Yes, I did blend the concealer over that freckle
if that gives you an idea of coverage
Did it add some lightness? Absolutely.  Did it cover some? Sure.  But you can still see that I've got some serious blue shadow going on.  For me, this level of coverage doesn't cut it.  Especially when I do not think that the application felt super smooth/even.  If your under eye circles don't have strong blue under tones, this concealer may be enough for you, you lucky girl.

Staying Power: I didn't set it with powder and it did stay at this level of meh-coverage all day, so that's something good.

Bottom Line
For me, this won't cut it.  If you are trying to just brighten up your under eye area and are not looking to counteract blue tones, you may enjoy this.  I think even at the drugstore price point I can find better.  I like Maybelline Instant Age Rewind Dark Circle Eraser (my shade is Medium), for instance.  At Target, you can grab Pixi's salmon toned concealer that is great on under eyes.  I think I can still make this product work by layering it with one of these two, but it won't work on its own for my uses.  Check out my other reviews for Flower stuff though, because like I said, I don't think the whole line is a bust!

Sunday, February 24, 2013

Quick Drugstore Haul and First Impressions: L'Oreal EverCurl Hydracharge Shampoo and Conditioner, Flower Beauty Concealer, and Nail Polish!

Hello lovelies! I made a quick trip to Target and Walmart this morning to pick up some groceries and of course that means that I picked up some hair and makeup stuff too.

I grabbed Flower Beauty Lighten Up Brightening Concealer, Sally Hansen Complete Salon Manicure in Mermaid's Tail, and L'oreal EverCurl Hydracharge Shampoo and Conditioner.

I will definitely be reviewing the hair stuff and concealer in depth, but I wanted to give you my quick first impressions of each product.

Flower Lighten Up Brightening Concealer
This stuff was pretty reasonably priced ($7.98).  The shade selection was a bit of a bummer though, as there were only four colors.  I debated between this one (BC2) and the next darkest shade for quite a bit, but settled on this one.  Luckily it matches pretty well with the concealer I've been using.

This concealer promises seamless coverage with a "lit from within effect."  I have really horrible, true blue under eye circles, so I always have low expectations for what a drugstore concealer will do for me.

When I got home, I wiped off the undereye concealer that I was wearing (Maybelline Instant Age Rewind).  This concealer twists up so that the product dispenses through a brush.  You've gotta twist it for a while for the first use as is usually the case with this packaging style, but it does dispense well once you get it primed.

This applied smoothly.  It's pretty pigmented and I did feel like it was comparable to my Maybelline concealer.  I've only used it once and haven't been wearing it for long, but it seems promising thus far.  

As I said, be on the lookout for a full review in the next week or so.

Sally Hansen Complete Salon Manicure: Mermaid's Tail
I picked this up because it is supposed to be a dupe for Deborah Lippmann's Across the Universe which I think is gorgeous.  It's been out for a little while as part of a seasonal collection but it has been promoted to a permanent spot in the line (it had it's own name slot at my Target).  

This isn't a color that I can wear on my finger nails right now because I'm in the midst of job interviewing, but I went ahead and did two coats on one nail so that you guys could see the color swatched.  I'm not planning on doing a separate review of this nail polish because I think most everyone is familiar with the Sally Hansen Complete Manicure line.  


This is a blue jelly filled with tiny blue glitter plus larger green and blue hexagon glitter.  

These pictures show 3 coats on a naked nail:
Naked nail: 1 coat
Naked nail: 2 coats
Naked nail: 3 coats (sorry about the messy edges! I wasn't being
careful since I knew I'd be taking this off right away)
These pictures show 2 coats over an electric blue (Sally Hansen Xtreme Wear in Blue It)

Over "Blue It": 1 coat
Over "Blue It": 2 coats
I love the way it looks over a blue nail polish.  I don't own a super dark navy, which I think would really make this something special, but I will definitely be purchasing one (hmm maybe Flower's April Showers...).  Like all glitters, it takes a bit of elbow grease to get it off, with I use 100% acetone as my remover, which makes it less of a chore.  I think this is a fun glitter that would work really well as an accent nail color or as a full manicure color

L'Oreal EverCurl Hydracharge Shampoo and Conditioner
This product is a spin off from the EverPure line of sulfate free hair products.  Both of these products are "100% sulfate free, no harsh salts, no parabens, natural botanicals, and 100% vegan." The shampoo contains silicones, however (amodimeticone, which generally does not build up, and a new cone to me, divinyldimethicone/dimethicone copolymer).  The conditioner contains mineral oil, so if you watch out for that ingredient, this conditioner is one to avoid (I personally don't have problems with mineral oil).

The shampoo bottle says that it is for wavy to tight curly hair, that it is non-drying, and that it uses an anti-frizz system of natural botanicals, including hibiscus and grape seed.  It promises to give you smooth, defined curls (every curly reading this just said "Yeah...ok...like I haven't heard that claim before!"  The conditioner also promises to give you smooth, defined curls.

The line also has a silicone-free cleansing conditioner, a leave in conditioner, and a cream gel.  I really wanted to try the cleansing conditioner, but it was sold out.  

My first impressions of this stuff are limited because I haven't actually used them yet.  But, I did pop open the caps to smell them and to take a look at the texture.

As far as the scent goes, let me just say I hate the smell of the other L'Oreal Ever-Whatever lines.  I think they smell very overpowering and fake.  This stuff, I was surprised to find, I like the smell of!  It's much more subtle/toned down from a quick bottle sniff, but obviously that opinion is subject to change after I get it on my hair!  Don't get me wrong, it's still pretty strongly scented.  It just isn't as bad as the other stuff from L'Oreal's hair care lines.

The shampoo is a semi-translucent pearly white and is pretty thick and creamy.  The conditioner is opaque, thick, and white.  They look promising!  I will be posting a full review once I've had enough washes to get a feel for what I think of them!  

Saturday, February 23, 2013

Worth the Splurge: Clarisonic Mia 2 Skin Cleanser Review

There are some products that are expensive but easily replaced by a comparable drug store product.  This is not one of those products!

I'm talking about the Clarisonic Mia 2.  For years, I held off from purchasing (first the original Clarisonic, then the Mia, and then the Mia 2...), reading great review after great review for this little device.  I tried the cheaper Olay version and wasn't impressed.  I sunk more money into products promising to do what the Mia promises to do: gently exfoliate, shrink pores, clear out acne, and leave your skin soft and bright.

Then I realized, what am I doing?! With all the money I've spent on this cleanser and that mask, I could've just bought the darn Mia by now!

So ladies, I'm here to tell you the Clarisonic Mia 2 is truly worth the splurge.

This image makes me want a fruity drink
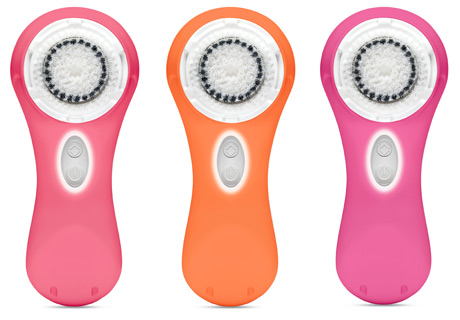
First off, what's the difference between the Mia and the Mia 2?  The Mia 2 has features that were originally only available in the full size Clarisonic cleanser: more than one speed, a timer, and a travel case.  I could live without the timer and the travel case, to be honest, but I can't live without the two speeds.  More on that in a minute.  The Mia 2 also comes in some really cute colors.

I've had my Mia for about 5 months.  What differences have I noticed in my skin since I began using it? The very first time I used it, I was blown away.  My skin felt so clean and I could immediately see that a lot of dead skin had come off. I have very dry, sensitive skin.  Unlike a lot of exfoliators, this one didn't leave my skin feeling tight or irritated and red.  I have large pores, and I can see a difference in the size of my pores over time for sure.  I also notice that my already infrequent acne has basically disappeared.  I get maybe one blemish a month.

You won't be able to stop touching your face! After I used it for the first week, my fiance was lovingly stroking my cheek before bed one night, and he said that my skin felt softer than it ever has and asked me if I was doing something different.  Now, I love him, but my fiance is not the most observant person on the planet.  If he noticed, there was a big difference.

How do you use it? I use it in the shower in the morning and at my sink at night.  Yes, even with my incredibly sensitive dry skin, I can use this twice a day without issue.  It's something I look forward to doing.  In the morning, I use it with Cerave Hydrating Cleanser .  I find this cleanser really hydrates my skin and preps it for my makeup by smoothing out any dry or rough patches. This cleanser is designed for sensitive skin, so it's fragrance free.  At night, I use it with Philosophy Purity Made Simple.  This stuff takes off every bit of makeup in about 30 seconds without bing stripping or drying.  The scent is very gentle and doesn't irritate.  I find that now that I'v used it at night for so long, the scent calms me and gets me in a bedtime zone!

I use the slower speed in the morning.  Why? Well, I already took my makeup off the night before.  My goal with morning cleansing is to clean off any oil or dry patches from the night of sleeping and to increase circulation to my skin.  I want a clean, smooth surface for makeup.  An unexpected result? I use less makeup.  I don't need to use very much liquid foundation at all now.  My concealer is just used for my undereyes, because I have really bad genetic dark blue undereye circles.  I find that I can get a nice smooth surface without piling on layers of makeup.

I use the faster speed at night when I really want to take my makeup off and cleanse away the day.  I find I only need about 30 seconds for the makeup to be gone, and I use it for another 30 seconds or so just because it feels good.  I then put on my moisturizer, and it's off to bed!

Brush heads.  I use the sensitive/delicate skin brush heads.  I find that they really cleanse well without being rough or irritating.  Amazon has the best price of any place I've seen because you get two in a pack.  I replace the brush head every three months.

I really can't recommend this product enough.  It's changed my skin for the better, and I don't intend to be without it ever again.  You invest hundreds of dollars into clothes and shoes, but you wear your skin every day.  That's what changed my thinking on the splurge of this product.  I have to show my skin to the public every day.  It's worth the investment.

Check it out: Clarisonic Mia 2, Philosophy Purity Made Simple Cleanser, Cerave Hydrating Cleanser, and Replacement Brush Heads

Friday, February 22, 2013

Top 5 Makeup Books to Put on Your Spring and Summer Reading Lists


As I mentioned in my post on the Top 5 Curly Hair Care and Styling books, I love reading!  Makeup books are no exception.  I used makeup books to teach myself how to apply makeup like the pros.  Now that I've got my favorite techniques down, I use makeup books for inspiration. When I find that I've been using the same eyeshadow colors or the same blush for a while, I flip open a book to find something that I can replicate or draw inspiration from.

Here are my Top 5 Makeup Books that I would recommend to my friends!

1) Making Faces by Kevyn Aucoin


Aucoin started his makeup career off with Revlon. He's launched several makeup lines around his philosophy that there should be makeup for every imaginable skintone that helps bring out natural beauty, rather than limited ranges that seek to cover and hide.  He's worked on celebrities from Julia Roberts to Cher. This book was a TIME bestseller.

This is the book to get if you're looking to learn how to apply makeup like the pros.  The photos are gorgeous and use non-celebrities to achieve a variety of different looks.  The book is from the 90s, but a lot of the looks are classics.  This is my favorite book to recommend to someone who asks me for advice on how to apply makeup.  It's a classic.

2) Jemma Kidd Makeup Master Class by Jemma Kidd


Jemma Kidd is a countess, former model, and makeup pro.  She runs her own cosmetics business and runs a makeup artist school in London.

This book will be a classic in 10 years! I think of this as the essential update to Kevyn Aucoin's book.  Published in 2009, this book has gorgeous photos and easy to follow advice for applying makeup.  This book excels at providing photos to backup what the author is saying.  Techniques are always photographed rather than just explained in text.  She recommends her own products throughout the book, which is a bit of a downside, but since everything is photographed, you can find your own versions of things easily.

3) Bobbi Brown Makeup Manual

Bobbi Brown is the beauty editor for the Today show and a self-made business woman.  She has her own makeup line and has written five books on the subject.

I have two of her books and this one is my favorite (the other one I have is Bobbi Brown Beauty).  This is a makeup encyclopedia.  I think this book lives up to its description of being for everyone between beginner and pro skill levels.  The photos and instructions are crystal clear.  This book overflows with tips and tricks that are easy to incorporate into what you're already doing (for example, applying concealer under your foundation for certain types of problem areas).  This is a must-have for makeup lovers.

4) Face to Face by Scott Barnes


Scott Barnes is a professional makeup artist.  His list of celebrity clientele is longer than a red carpet line at the Oscars.

This is the most unique book on the list.  The others are about technique whereas this book focuses more on creating distinct looks.  There are looks from a corporate appropriate look to a dinner date to a red carpet.  Keep in mind that this isn't going to give you the same level of step-by-step how to's, but in conjunction with the knowledge one of the other books can give you, this book can serve as meaningful inspiration and guidance when you're deciding what makeup to wear for a certain occasion. This would make an amazing housewarming gift for a young woman moving into her first apartment! This would look very chic on a coffee table or on a vanity as it's hardcover.

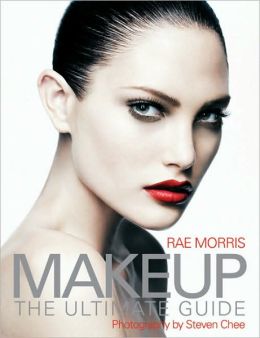
5) Makeup: The Ultimate Guide by Rae Morris


Rae Morris is a former model who has written three books on makeup thus far.  She works as a makeup director for L'oreal and is a four time winner of Australia's Best Makeup Artist.

This book is for those with the basic set of skills already mastered. This would make an amazing coffee table book for a young woman's apartment! The photos are editorial and very high fashion glamorous.  They are a great source of inspiration when you are stuck in a makeup rut.

Friday, February 15, 2013

Review: Flower Cosmetics Nail Polishes

Next up for review: Flower Beauty nail polish!
Left to Right: Fanatical Blossom, Gorgeous Gerbera
These nail polishes promise "super short dry time, smooth application, [and] premium glossy shine" in two coats.  Sounds good!  I picked up two colors: Gorgeous Gerbera and Fanatical Botanical.  Gorgeous Gerbera is a peachy pink that is very trendy for spring, and Fanatical Botanical is a metallic rose gold.

What I look for: 1) opacity in two coats, 2) shiny finish, 3) good staying power.

Color Selection: I want more! There are 16 shades in the collection right now. There were several reds and lots of light colors, but only 2 dark colors.  This collection right now screams trendy for spring but wearable for everyone.  There were only a couple of colors that I thought would be inappropriate for a professional woman to wear to work (either because they were super bright or super dark).  I was on the edge of grabbing one dark shade called April Showers which was a very dark blue, but I thought it would probably come across as black from far away because of how dark it was.  I was also tempted to grab the mint green, but I already a mint green at home and couldn't justify it.  I definitely want to pick up one of the reds but I couldn't decide on this first trip, plus I didn't know if I'd like them enough to buy more.

Price: These are a great deal at $4.98 a piece.

Formula: A quick note here for someone who took many hours of college chemistry.  The company totes these nail polishes as having a "3 free" formula, and explains that this means that they are free of DBP, toluene, and camphor.  I'm not looking to start a debate, but here are my thoughts on this. Dibutyl phthalate (DBP) has, according to Wikipedia, been phased out by all major U.S. nail polish producers since 2006.  So that's not a very special claim, but I suppose it's a good thing. Toluene is sort of like the weak younger brother of benzene, a carcinogen.  Toluene itself has very little carcinogen potential, and only causes significant effects when inhaled in large quantity. Most major nail polishes are also toluene free.  Again, I suppose it's a good thing not to have it, but still not a unique thing.  Finally, camphor. This claim confuses me. We use camphor as a flavoring in food! It's very aromatic.  It's also soothing for inflammation and is in many anti-itch medicines.  Camphor is only toxic in large doses.  So again, I suppose good for them for not including it, but I wouldn't run away from the ingredient in everything.

Application: These applied pretty well.  I found that I needed to put on a thicker first coat with Gorgeous Gerbera than what I would ordinarily use because of some streakiness. But what's weird is that Fanatical Botanical was not streaky at all and I was able to do thin coats! So maybe I got a bad bottle of Gorgeous Gerbera or maybe it just varies from color to color. The consistency is very smooth and the brush size is perfect in my opinion. The second coat went one much nicer than the first with Gorgeous Gerbera, and as you can see below, I was able to get a nice finish.  In the future, I will likely use a base with Gorgeous Gerbera to see if that helps the first coat go on a bit more evenly. I don't think I would do that with Fanatical Botanical, as I was quite happy with that application.

The brush is shaped like a traditional nail polish brush as opposed to the wider brushes that some companies are doing now (like Sally Hansen Complete)  The cap to the polish is quite large, which I don't mind but it could hinder application for some.  The coats dry quickly and are touchable within about 3-5 minutes, even with the thicker coats I was using with Gorgeous Gerbera.

Gorgeous Gerbera: First Coat
Gorgeous Gerbera: Second Coat
Fanatical Botanical First Coat
Fanatical Botanical Second Coat


Final Results: I think that the colors on my nails, for once, looks better than in the bottle.  The colors on the nails really pop! I can't stop looking at them, but in a good way.  Very pretty shades.  You may be able to see some brush strokes when it's all said and done though. Gorgeous Gerbera was truly opaque.  Fanatical Botanical is a little bit more sheer (you can see if you have dirt under your nail).  They dry very shiny on their own.  I did not feel a need to use a top coat.

Gorgeous Gebera (Note to self..Clean up edges before pictures!)

Staying Power:
A picture is worth 1000 words, so here's the time lapse! In the interests of getting this post published sooner rather than later, I am only showing the staying power pictures for Gorgeous Gerbera.  I have thus far not had any early peeling or chipping with Fanatical Blossom.
At the end of Day 1
Late in Day 2
End of Day 3
End of Day 4. One little chip.
I took the polish off after this photo to put on Fanatical Botanical
Bottom Line:  
I think these are good for the price.  The application may vary by color, but the shades are gorgeous and very on trend yet wearable.  I will purchase more of these.  I'm anxious to try one of the red shades.